

Being gone for a couple of weeks meant that some of my projects were put on hold, so I just hung my patriotic wreath last night, about 10 minutes before our company arrived! Talk about last minute! But, it's done and now I have one for next year all ready to go!

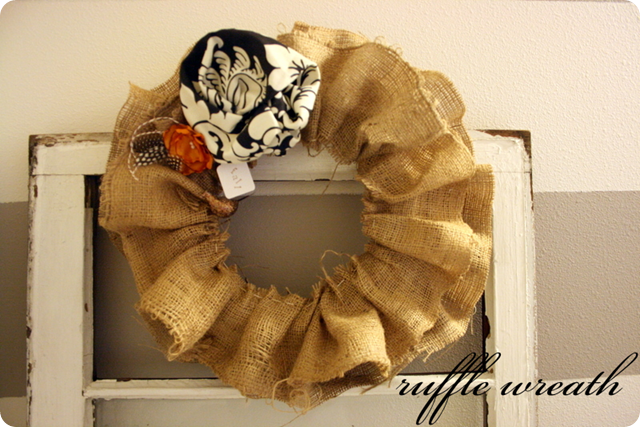
There are a billion burlap wreaths in the blog world, so this is nothing new, but I did something that I haven't seen before to attach my flowers. Instead of using a hot glue gun to affix them on the wreath, I used safety pins.


Here are my three reasons why:
1. It's a bit more practical in that if I want a new wreath, all I need to do is undo the safety pins and add flowers with different fabric (or another accessory that strikes my fancy). I don't want to keep buying wreath forms so this was the way to go on a tight budget.
2. Hot glue doesn't hold up so well in the heat. When we came back from one of our recent trips, the new moss covered 'W' I had made for our front door was laying on the front stoop. The ribbon that I had glued on had come undone! I figured safety pins would be a bit more sturdy.
3. My husband recommended it and I like to make him happy. My original plan was to attach the flowers with thread and tie it around the entire wreath, but when he suggested safety pins I thought that would be a perfect idea! He's the best!
I'll be linking this interchangeable burlap wreath tip over at Home Stories A to Z.
GIVEAWAY:
2 YARDS OF BURLAP
To Enter: Become a follower of Only From Scratch
and
leave a comment on this post telling me you've done so.
(If you are already a follower, simply leave a comment on this post).
For a 2nd Entry, blog about this giveaway and leave a comment with a link to your post.
For a 2nd Entry, blog about this giveaway and leave a comment with a link to your post.
This is my way of encouraging you to 'get your craft on' as they say, for those who haven't.
And a way to help you crafty pros to keep at it!
All entries must be submitted by Thursday, July 7, 9PM.
I will announce the winner on Friday, July 8.
(Winner must have a US Mailing Address)
(Winner must have a US Mailing Address)
Re-purpose Old Jewelry
 |
| via Tatertots and Jello |
 |
| via Under the Table and Dreaming by Stephanie Lynn |
 |
| via Living with Lindsay |
 |
| via Jones Design Company |
 |
| via Cozy Cottage Cute |
 |
| via Living with Lindsay and Beneath my Heart |
There are a million things you can do with burlap, so enter now!
Ooo I'd love to get my craft on with some burlap! never have used it before, but I love the wreath idea!
ReplyDeleteMary Beth (www.theblueladybug.com)
(its not leaving my name!)
Oh I've actually been wanting to try a new project with burlap! Just started following you a few days ago and I love your blog! I also love the wreath you've made a safety pinning the flowers on was genius!
ReplyDeleteI am a follower! That wreath is so easy to change out the embellishments for each season and upcoming holiday. Great idea!
ReplyDeleteSo smart to use safety pins so you can change it up each season. I would love some burlap! I like that burlap runner. Maybe I can drum up some craftiness in me and figure out how to fashion one.
ReplyDeleteThat is a super cute wreath that is practical! I always love burlap! I'm already a follow :)
ReplyDeleteI am now a follower, Love the burlap wreath. I think I could handle the burlap lamp shades and maybe the stocking. I have wanted to make our Christmas stocking for a while.
ReplyDeleteI like the burlap table runner.....that would look great in your dining room! I also like the menu frame.
ReplyDelete