Showing posts with label burlap. Show all posts

Monday, April 30, 2012

Framed Photos Matted with Burlap

My in-laws have a photo gallery wall in their stairwell that I have always loved!  Their life and ministry have taken them all over the world, so they have various pictures displayed of special places they've been.  Bradley and I haven't been able to travel extensively together in our almost 6 years of marriage, but we have traveled a little, so we decided to frame some of our favorite 'spots' and begin working on our stairwell.


I had some frames that a friend had given me, so I simply cut some burlap to the size of the frame, placed the picture in the center, and hung them on the wall!  Such a simple project that only cost me the price of printing out the pictures.

Photo from our honeymoon of Mayan Ruins in Belize

Golden Gate Bridge, San Francisco, CA

Highway 1 in California {family vacation 2010}
If you don't have burlap lying around your house {like I do} it really isn't that expensive.  You can purchase it in most fabric stores--you'll find it with other utility fabrics.  I like the texture that it adds to the photos.  Right now I'm keeping the frames in their original stain, but I'd eventually like to paint them an heirloom white.  We have yet to paint the stairwell, foyer and hallways {mostly because of the high ceilings} so until then I am living with builder grade flat paint, which is a great collector for toddler fingerprints!


What simple projects have you completed lately?


Monday, August 22, 2011

Message On a Bottle

Whenever I went to the beach as a kid I always looked for bottles as I jumped through the waves.  I thought it would be amazing to find a message tucked away in a bottle.  It never happened, in case you were wondering.

This project is really simple:  dress up an old bottle and use it to send messages to people in your home.  It's not quite as romantic as finding a message in a bottle that has washed up on the shore.  But, it can achieve the same purpose of romance with your spouse, encouragement to your kids, or words of inspiration and welcome to guests.


Supplies:
-an old bottle (mine was from my cream sherry that ran out--need to get some more!)
-scrap piece of burlap
-hot glue gun
-scissors
-ribbon or other item(s) for embellishing

Lay the bottle on the piece of burlap and wrap burlap around the bottle to desired size (leave a bit of an overhang to fold over for a nice finish).


Place a strip of hot glue and attach one end of burlap, being careful not to burn your fingers as the glue will come through the fabric. 


Put another strip of glue, little by little, to attach the other end of the burlap.  Pull tightly on the burlap as you glue so there are no bumps around the bottle.


Fold this end over and glue again, leaving a finished edge.


This is what it will look like when the burlap is glued on


I wanted the majority of my bottle covered, so I cut my burlap a bit long.  I like the frayed edges.


Find  a piece of paper to use for your message.  I didn't have a hole punch, so used a push pin to make a hole in the paper to slip the ribbon through.


Embellish the bottle as you like.  I was 'sending' a  message to my husband so I made it pretty simple with just a black ribbon.  I can picture scrap fabrics, rosettes, all kinds of things--be creative!


Place your message where your desired recipient will find it easily.  I wanted my husband to see it when he went to bed, so I left it on his nightstand.  He loved it and said that it really encouraged him!  Mission accomplished.


One of the nice things about this bottle is that your husband could easily reciprocate by writing and attaching his own message.  Perhaps, he might even leave a single rose in the bottle for an added touch.  This is just a small way to express your love, but it might have a great impact.  


Friday, July 1, 2011

4th of July Wreath and a GIVEAWAY!


Being gone for a couple of weeks meant that some of my projects were put on hold, so I just hung my patriotic wreath last night, about 10 minutes before our company arrived!  Talk about last minute!  But, it's done and now I have one for next year all ready to go!


There are a billion burlap wreaths in the blog world, so this is nothing new, but I did something that I haven't seen before to attach my flowers.  Instead of using a hot glue gun to affix them on the wreath, I used safety pins.


Here are my three reasons why:

1. It's a bit more practical in that if I want a new wreath, all I need to do is undo the safety pins and add flowers with different fabric (or another accessory that strikes my fancy).  I don't want to keep buying wreath forms so this was the way to go on a tight budget.

2. Hot glue doesn't hold up so well in the heat.  When we came back from one of our recent trips, the new moss covered 'W' I had made for our front door was laying on the front stoop.  The ribbon that I had glued on had come undone!  I figured safety pins would be a bit more sturdy.

3. My husband recommended it and I like to make him happy.  My original plan was to attach the flowers with thread and tie it around the entire wreath, but when he suggested safety pins I thought that would be a perfect idea!  He's the best!

I'll be linking this interchangeable burlap wreath tip over at Home Stories A to Z.

GIVEAWAY:
2 YARDS OF BURLAP
To Enter: Become a follower of Only From Scratch 
and
 leave a comment on this post telling me you've done so.
(If you are already a follower, simply leave a comment on this post).
For a 2nd Entry, blog about this giveaway and leave a comment with a link to your post.
This is my way of encouraging you to 'get your craft on' as they say, for those who haven't.
And a way to help you crafty pros to keep at it!
All entries must be submitted by Thursday, July 7, 9PM.
I will announce the winner on Friday, July 8.
(Winner must have a US Mailing Address)


Here are some ideas to inspire you about what you can do with burlap:

Re-purpose Old Jewelry
via Tatertots and Jello
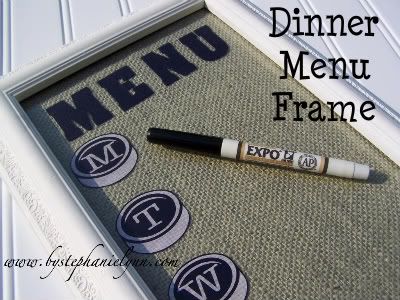
Erasable Menu Frame
via Under the Table and Dreaming by Stephanie Lynn
Burlap Table Runner
via Living with Lindsay
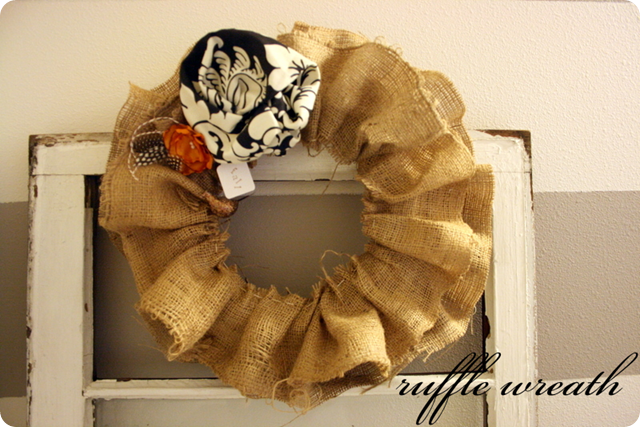
Ruffle Wreath
via Jones Design Company
Burlap Stocking
via Cozy Cottage Cute
Cover a Lampshade
via Living with Lindsay and Beneath my Heart

There are a million things you can do with burlap, so enter now!