Showing posts with label baby. Show all posts

Thursday, July 25, 2013

Introducing Baby #4: A Birth Story

I opened up blogger the other day and noticed that it's been almost one month since I posted anything.  That's the longest I've gone in a while, and I apologize for the absence.  The last few weeks of my pregnancy were pretty tiring.  However, our little girl has arrived!  She's two weeks old today!

Introducing....


Most people who read this blog are women, and most women like to hear the birth story, so let me indulge you.  If you don't care about the details, you can just scroll through the pictures.

This is my fourth baby, and apparently I still don't know what it's really like to be in labor.  We made two visits to the labor/delivery ward before I actually gave birth.  The first trip was June 23, after having contractions for two hours, every five minutes at home, we went in, only to have my contractions increase but no progress made toward labor.  Being sent home was pretty frustrating.  The doctors and nurses continued to be surprised when I would show up for my weekly appointments.  Another false alarm on July 7, my due date, only to have the same thing happen: contractions close together and worse in pain, with no changes.  We got sent home again.

Finally, at my appointment on July 10, I happened to be in tears from something else, when a sweet doctor {this was now the 4th doctor I had seen in 3 weeks} took pity on me and agreed that I could be induced.  I was at 4 cm, and things were ready to go; this little baby girl just needed some help. We received an induction appointment for the next morning and I was elated!  I had never been induced before, so it was strange driving to the hospital, not in labor, knowing that we would have a baby soon.  It was also comforting, though, to know that the other three kids were taken care of, I'd had a good night's rest, and my makeup and hair were fixed.


When we got to the hospital my room wasn't ready, so we grabbed a bite in the cafeteria and hung out in the waiting room for about an hour.  They finally escorted me to the labor/delivery room.  It was the same room where I had given birth to Mason just 15 months before.  This had been one of my fears, but it really wasn't emotional at all to be in there this time around.


By 8:15 I was hooked up to the monitors.  At 9:00 the Doctor came in, another new face.  I was then at 5 cm, so he broke my water and they said they'd start the pitocin right away.  I was still not having any contractions at this point, but I really didn't want to feel them, so I opted for the epidural.  It took effect fairly slowly, which was actually really nice for me.  By 11:30 I could tell I was in transition, as my legs were shaky and the contractions were coming pretty strong and close together.  The epidural worked, but I felt just enough pain that I was able to tell what was going on, which I liked.  Around noon, it was time to push.  Everyone started gathering around:  the new Doctor who broke my water, his Attending Physician, and a recent Medical School graduate, 2 weeks out of school, who had never delivered a baby.  {I love providing education for new Doctors; I really do actually, I just find it humorous that there were so many present}.

Our girl, Jennavieve Lorraine, was born at 12:22pm, pink, healthy, and very big.  We all sat waiting as they put her on the table to see how much she weighed.  Even the Doctor was surprised when 10lbs came up on the monitor!  The most amazing part of all is that this was my first delivery that didn't include any tearing or need for stitches, and she is our biggest baby!  The delivery was so smooth and I had no complications, also another first.  We were so thankful and I was very relieved to not be pregnant anymore.


We had a great day Thursday and Friday together, just loving on her and holding her.  She was such a content baby, hardly crying, waking every 3 hours to eat---it was pretty much perfect!


Saturday morning, we were getting ready to be discharged when the nurse discovered Jennavieve had a fever.  Fevers are never a good sign in a newborn, so she was taken to the NICU to determine what was going on.  After an x-ray, they discovered that she had pneumonia.  I was discharged, but our little girl had to stay at the hospital.

She's now been in the NICU for 12 days, and we received word on Monday that she'll be able to come home this Sunday.  She's doing great, healing well, and we can't wait to have her at home with us!  I'll write more about this experience sometime, but for now, I just wanted to leave you with the news of her arrival.

Thursday, March 14, 2013

Ice Cream Outing Surprise

Last night we took the kids to get frozen yogurt {they think it's ice cream, so we'll just call it that}.  We don't do this very often, but it was a special day and we wanted to surprise the girls with some news.


 Usually they get to pick their own ice cream and toppings, but last night we were a bit more selective.  We wanted them to have a certain color.


Any guesses as to what we wanted to share?


You guessed it!  We're having another little girl!  She'll be joining us around July 7th, so I'm almost 24 weeks right now.  This pregnancy has been a little rougher than the others.  I think each one gets a little more challenging.  Not only am I older each time, but there are more children to care for, and that takes a toll on me.  I would be very happy if this sweet little girl decides to come a little early.

Isabella's response to finding out she would have a little baby sister, "Oh, that's so fun!"  Mallory was too absorbed in her ice cream to respond much at all.  She just wanted to know what her baby sister's favorite color would be.

I'm trying to wrap my mind around having another little girl in the house.  I was convinced this one was a boy, so I have to say I was a bit in shock yesterday afternoon.  I do have a few little outfits I picked up at a church swap last month, so her little wardrobe has begun.  I've saved some of the girls' clothes, but they were both born in the winter, so this little one will be sporting sizes in a different season.  I can't say I'm disappointed to have to get new little girl things!

Here's to ruffles, bows, ribbons, and lots of fun!

Thursday, March 7, 2013

Creative Ways to Reveal Baby's Gender

Finding out the gender of your baby either before birth or at birth are both exciting and it's a surprise either way.  We have taken the approach of finding out the gender with every other baby.  Our first and third babies were surprises, and number 2 we knew we were having a girl.  Why every other?  I don't want to know and my husband does, so we take turns.  We are expecting #4, so we plan to find out this time around.  Next week is our scheduled ultrasound, so as long as the baby cooperates we should know the gender by the end of next week.

One of my dear friends just found out yesterday the gender of their first baby and it was so fun to celebrate with her!  I've got gender reveals on my mind, so I thought I would round up some creative ways to reveal the baby's gender.


Put colored confetti in your hands, snap a picture and share.

Source: flickr.com via Jessie on Pinterest


The ever popular colored icing in the cake.  Cut into the cake to find out if it's pink or blue.
source

Make a movie poster announcing the gender.  This is such a creative idea!
source
Put a little note inside of a plastic egg and give to friends and family.
source

Hire a professional photographer or ask a friend to take a picture of your family opening up a huge box filled with colored helium filled balloons.


What other creative ideas do you have? Share links in the comments!

Monday, February 18, 2013

Toddler Bib from a Hand Towel


About four months ago, I stumbled upon a tutorial for a toddler bib by Amy at Positively Splendid.  I loved the she had a bib I could make following a simple pattern and applying bias tape.

I had read that children with Down Syndrome can have a difficult time learning how to eat, and that it can get pretty messy.  This is definitely the case with Mason.  He's a good eater, but we go through one bib at every feeding, and sometimes I feel like I should be wearing a bib too!  This toddler bib fits snugly around his neck, and covers his entire torso, keeping the food that spills out of his mouth on the bib {and occasionally on my shirt and glasses}.

Pre-eating mess

All you need to make these:

-hand towel
-bias tape
-coordinating thread
-velcro
-pattern from Amy's tutorial


I followed Amy's tutorial almost exactly, including using her pattern.  However, instead of using snaps on the back like she did, I opted for velcro.  My only reasoning was that I had some on hand.  So, follow her tutorial, and if you want to use velcro instead of snaps, simply sew the velcro onto the back in the same placement as the snaps.


The armholes have a reinforced seam, keeping them well intact.


The pattern is stated to be toddler size, but it fits my 10 month old baby, and my four year old daughter, who modeled it for me.  She was a ladybug that day.


Appliques would be super cute on the front of these.  My mother-in-law happens to have an embroidery machine, so she graciously placed Mason's monogram on them for me.  Keeping it plain would work just fine, too!  This is a great gift and a perfect beginner sewing project.

Linking to:

Home Stories A2Z

Friday, February 15, 2013

No-Slip Baby Girl Hair Bows

One of my goals this year is to become a pro at making hairbows.  We live in the South, and although I don't require my girls to wear bows every day, or even to church every week, I do like to have a collection of bows for them to wear.  I've chosen not to fight this battle with them.  My 3 year old is a pig tail lovin' girl, and I'm okay with that.  

Believe it or not, I used to make and sell hair bows for a children's boutique when we lived in Monterey, CA.    It was a fun little side business, and because of that I now have quite a supply of alligator clips.  In an attempt to accomplish my goal, I decided to use up the remaining pieces of grossgrain ribbon I had on hand, and make some baby girl hair bows.  

This tutorial, from Make It & Love It, is excellent!  I love that no actual bow-making skills are required for these bows.  You simply loop ribbon, crisscross it, and hot glue it.  


They turned out really well and the best part is that they have a little secret material that keeps them from slipping out of your baby girl's hair!  Who would have thought that shelf liner would be used for our children's hair?  Well, it's the perfect solution for wispy little baby hairs.


In case you might be thinking this is some sort of announcement about Baby #4's gender, it's not.  These little bows are going to a friend of mine who had a baby girl not too long ago.  We won't find out the gender for a few more weeks {I procrastinated in scheduling my ultrasound--guess that's what happens the 4th time around}, but I'll be sure to let you know when we do!


These would make a great gift for a new baby girl, or just whip up a few for your own little one.  I'm now well on my way to meeting my goal of making hair bows.  I think for the next type, I need to actually learn how to make a bow. ;)

Happy Friday!

Thursday, January 24, 2013

Make Your Own Baby Food

One of the things that I've really enjoyed during with all three of my children is making baby food.  For some this might sound like a horrible waste of time.  'Why make baby food when you can purchase it so easily from the store?'


There are many reasons that people choose to make their own baby food.  Mine is not for health purposes necessarily, although I do like knowing exactly what is in the food I'm feeding my baby.  My reasons are primarily two-fold:

1. It's a bit more economical.
2. I enjoy it.

My general rule of thumb in grocery shopping is to only buy produce {and meat} that is on sale during a given week.  If I'm going to make baby food for a member of our family, I simply purchase more of that produce than the rest of us would eat, cook it up, and freeze it for the baby.  It's amazing how many servings of baby food you can get from just two sweet potatoes, for example.


For some strange reason, I have gotten a great deal of satisfaction out of making baby food.  I guess that's why I have a blog titled Only From Scratch.  I like to cook and bake, and I enjoy doing it starting with the basics and ending up with something delicious.  Making baby food is similar to putting together a meal for my family.  When I heat up that little block of frozen peas, I smile remembering that I put that together for my baby.  {You can go ahead and think I'm weird, that's okay--just trying to be honest with you!}

Up until having Mason, I just did a bit of online research on how to make baby food.  There are some great materials out there, but this time around, I wanted something more concrete.  So, I purchased a little baby food cookbook by Annabel Karmel, titled, Top 100 Baby Purees.


I noticed in the store the other day this same author has several other cookbooks on food for children and families.  Her recipes are simple, which is great.  And, the nice thing about the baby food cookbook is that she breaks it down by age of the baby, so you know exactly what is appropriate at each stage of feeding.

The basic supplies for making baby food:

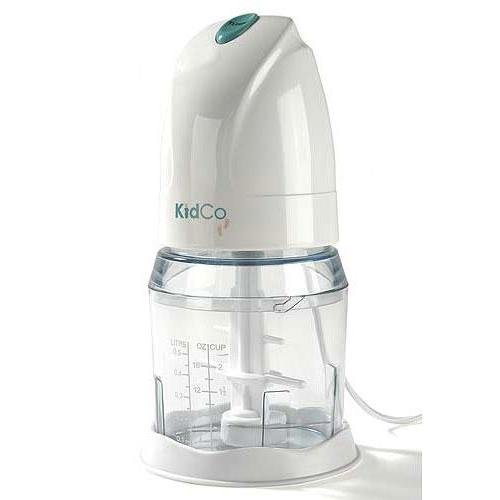
-Food processor {this is all I've ever used}, blender, or specialty baby food blender, like this one:

.
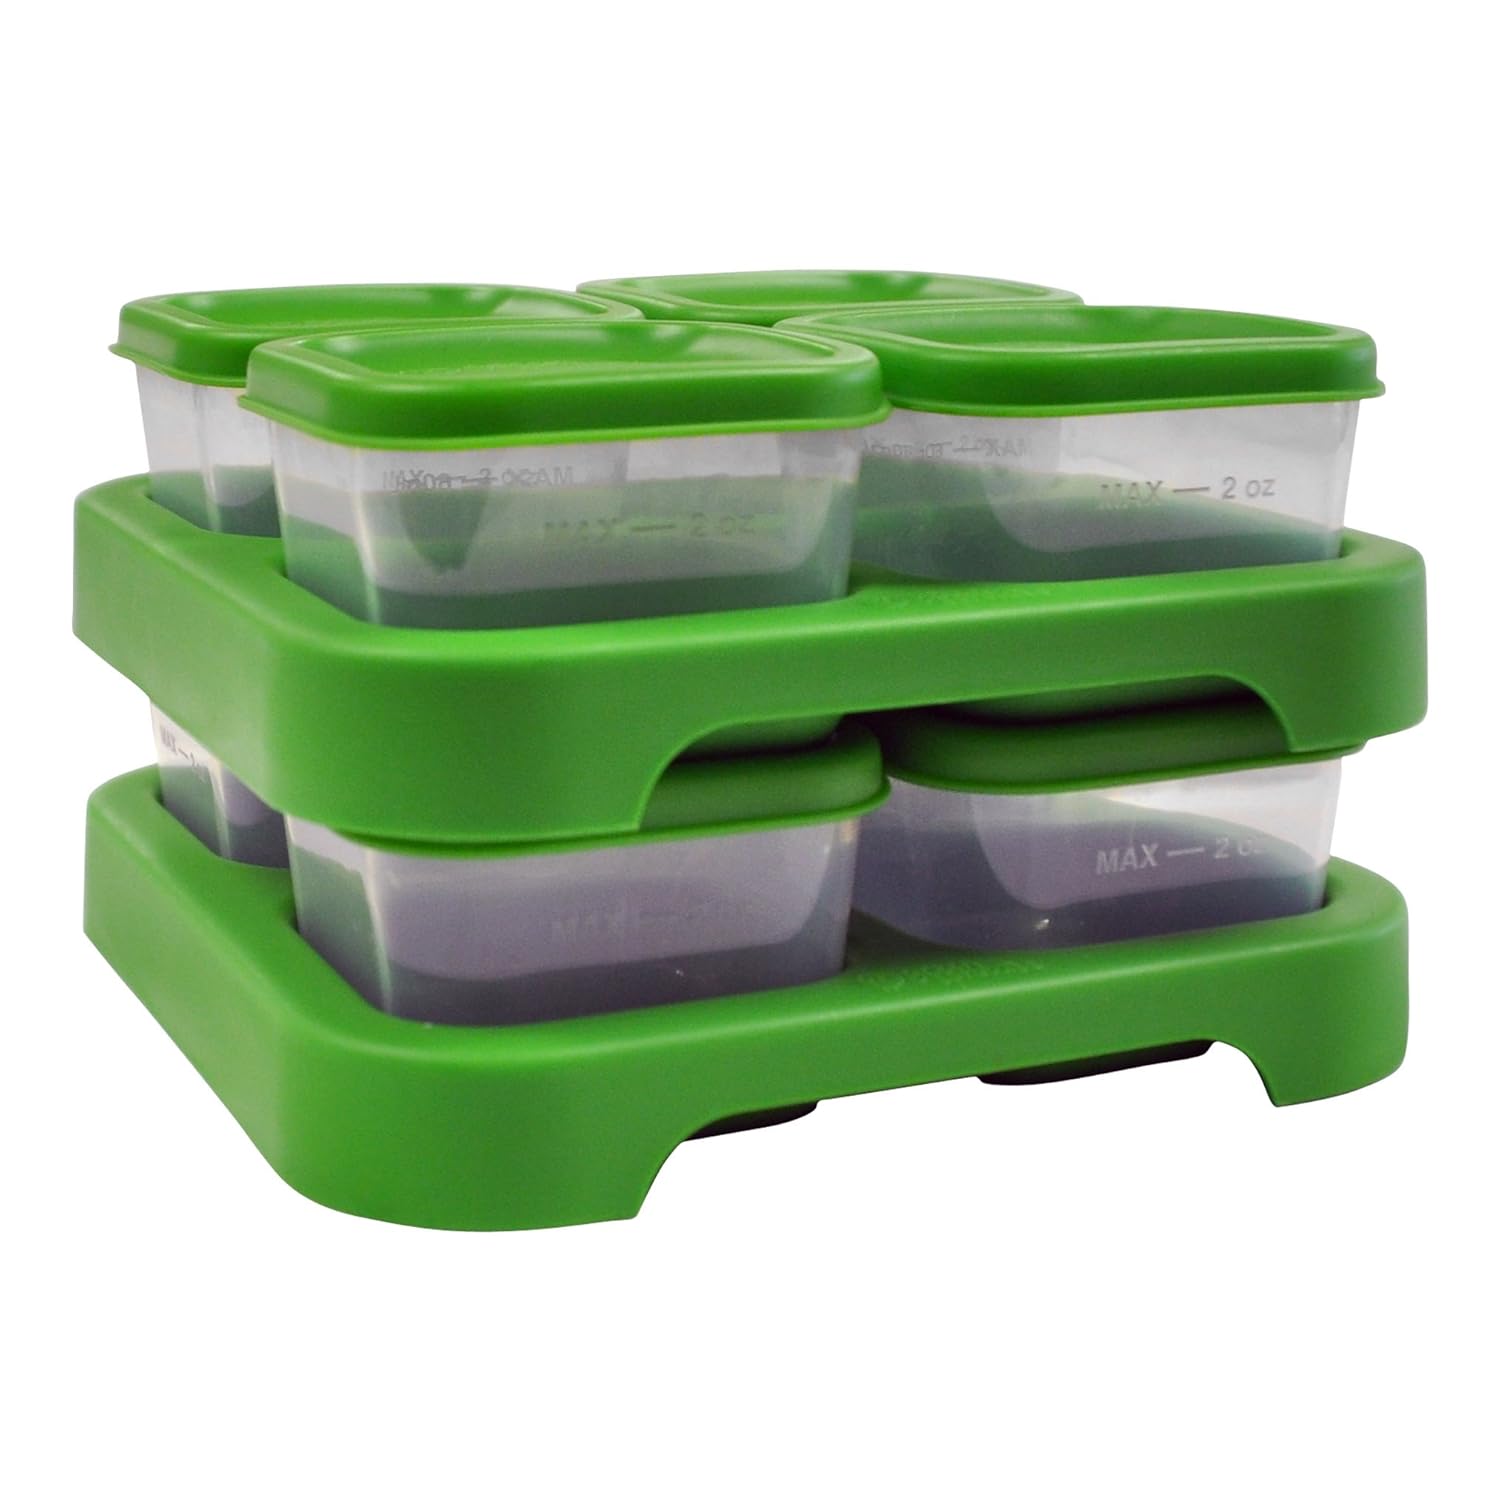
-Freezer containers for storage.  Ice cube trays work great, and usually each cube is 1 oz. capacity.  Several companies also have storage containers specifically for baby food.  I use a combination.  I have an ice cube tray that I use.  Once the food is frozen, I simply pop it out and store the cubes in freezer bags.  I also purchased these storage containers, you can find them here.

-Vegetables, fruit, and water.  It's pretty basic.

My friend, Mary Beth, shared a great post on how she makes her baby food, which I'd encourage you to read if you're considering this.

One of the greatest things I like about making baby food is that you have the privilege of offering a variety of foods to your baby much earlier than if you purchase them from them a jar in the store.  Avocadoes are one of our favorite foods, and you just can't find that in a jar at the store.  This is a great first food for babies!

Next week I'll be back with a recipe or two for baby food.  You see, I've been buying food lately, because I wanted to get a good head start with Mason and I wasn't in the mood to cook {it's that pregnancy related lack of motivation I get in the beginning}.  After buying a good set of food, though, I realized just how much money I save if I make it at home, so once we go through the batch I purchased, it's back to homemade!


Tuesday, November 1, 2011

Nursery Inspiration

For those of you who may have missed my announcement the other day in my post about Cheese Dip, we are joyfully anticipating the arrival of another little one into our family!  I'm a little over 14 weeks right now and definitely feeling pregnant.

This pregnancy has been a trial for me in truly trusting the Lord.  I miscarried a baby last March, and I would be lying to you if I said that getting pregnant again wasn't a scary thing.  Anyone who has miscarried can probably relate to the fact that you wonder if you'll ever be able to have a baby again (or ever have a baby if you don't have other children yet).  The Lord was very gracious to us and we found out I was pregnant about a week before our other baby would have been due.  We kept the new to ourselves for awhile, because we wanted to have a good ultrasound, with a heartbeat, before telling anyone.  I struggled during those first few weeks to leave the entire situation in the Lord's hands, knowing that He was in control, the baby was His, and He would do what He deemed best.  Hearing the baby's heartbeat for the first time was awesome!  I've still struggled in trusting God throughout this, but He continues to teach me to not fear and trust Him completely.

At this point we've decided not to find out the gender of this baby (some of our friends call us crazy).  We didn't find out with our first child and I loved that moment after giving birth when they said, "It's a girl!"  There are definitely pros and cons to each way, but neither is right or wrong.

I've never been able to really decorate a nursery before.  When we had our first baby, we were living with my parents (husband was just beginning his Navy career), and with our 2nd, we lived in a tiny 2 bedroom apartment, so the 2nd bedroom was also the guest room.  Now, we actually have space for a nursery and I have to say I'm pretty excited about getting to decorate for this little one.  Currently, the room we will use as the nursery has a crib and a queen size bed in it (it's the 2nd guest room) but I'm hoping to convince my husband to put the bed in the attic for awhile so it can just be a nursery.  We'll see how that goes over...

Anyway, on to the subject at hand:  inspiration for the nursery.  There are several requirements for this nursery:
1.  It must be gender neutral.
2.  The cost cannot be great.
3.  Most decor will be DIY driven (see #2)
4.  The colors need to somewhat fit in with the rest of the house.

These are my requirements thus far, the list will probably grow, but this is the start.  So, I've spent just a little bit of time looking for inspiration and here are the photos I've found.


I am seeing this alphabet art everywhere right now!  Not sure if I really like it, but I do like the pops of color against the blue wall.


The slight orange with blue combo really struck me.  There's no way I'm painting stripes on the walls, but the look is nice.


The roman shades stuck out to me in this photo, although I do like the celery color on the wall and non-baby fabric choices.


Blues and greens are my favorite, and this room looks pretty simple.


The idea of hanging fabric shelves is great!  They're functional and you can add more color with great fabrics.


This room seems more girly to me than gender neutral, but I do like the simplicity of it.


Embroidery hoop art is perfect for any room, but I like it in a nursery for added color.  A clock is a must so as to keep track of nursing time :)


I like the turquoise (NOT painting the ceiling!) and those floating shelves are great.


These are my initial thoughts on the nursery.  I hope to figure out how to make an inspiration board, so once I do come to some conclusions (probably in April, right before the baby is due) I'll let you know.

Happy November!