Showing posts with label reupholstery. Show all posts

Friday, February 8, 2013

Tufted Rocking Chair Re-do

Several pieces of furniture in our home have been given to us by Bradley's parents.  Not family heirlooms, but special pieces that were made in Togo, West Africa, where they served as missionaries for 16 years.  I love our woven dining chairs that sit around our kitchen table, the teak rocking hippo in Mason's nursery, and now I'm really loving this teak tufted rocking chair that graces my Master Bedroom sitting area.


This rocking chair was upholstered by a gentleman in Togo.  He did an excellent job with the original fabric, matching it up perfectly, tufting it quite nicely, and placing some decorative nailhead trim along the back.  This is the only before picture I could find.


When I decided to tackle this project, I did what any normal person would:  enlisted the professional help of my mother-in-law!  She is an excellent seamstress, and has done much more work with upholstery than I have.  Boy, am I ever glad that she did this for me!  I think it would still be sitting in disrepair.


Growing up I would always want to help my dad with a project.  I remember distinctly wanting to help him dig fence post holes.  He looked at me and said, "Lauren, it's a lot harder than it looks."

Let me just tell you that tufting a chair and applying nail head trim are both 'harder than they look.'  Don't enter into these projects lightly!  Much time and care are needed.


My mother-in-law did all but three of the tufts, so I can't take credit for that.  She even covered the original buttons, so we saved some money there.  I purchased the fabric at my favorite fabric outlet in town, and only paid $11.  It's a nice ivory color with a very subtle herringbone print.  I like how it contrasts with the color of the wood.


Stapling the fabric to the chair was the easiest part, and there was no sewing involved in this re-do, which is always a plus!

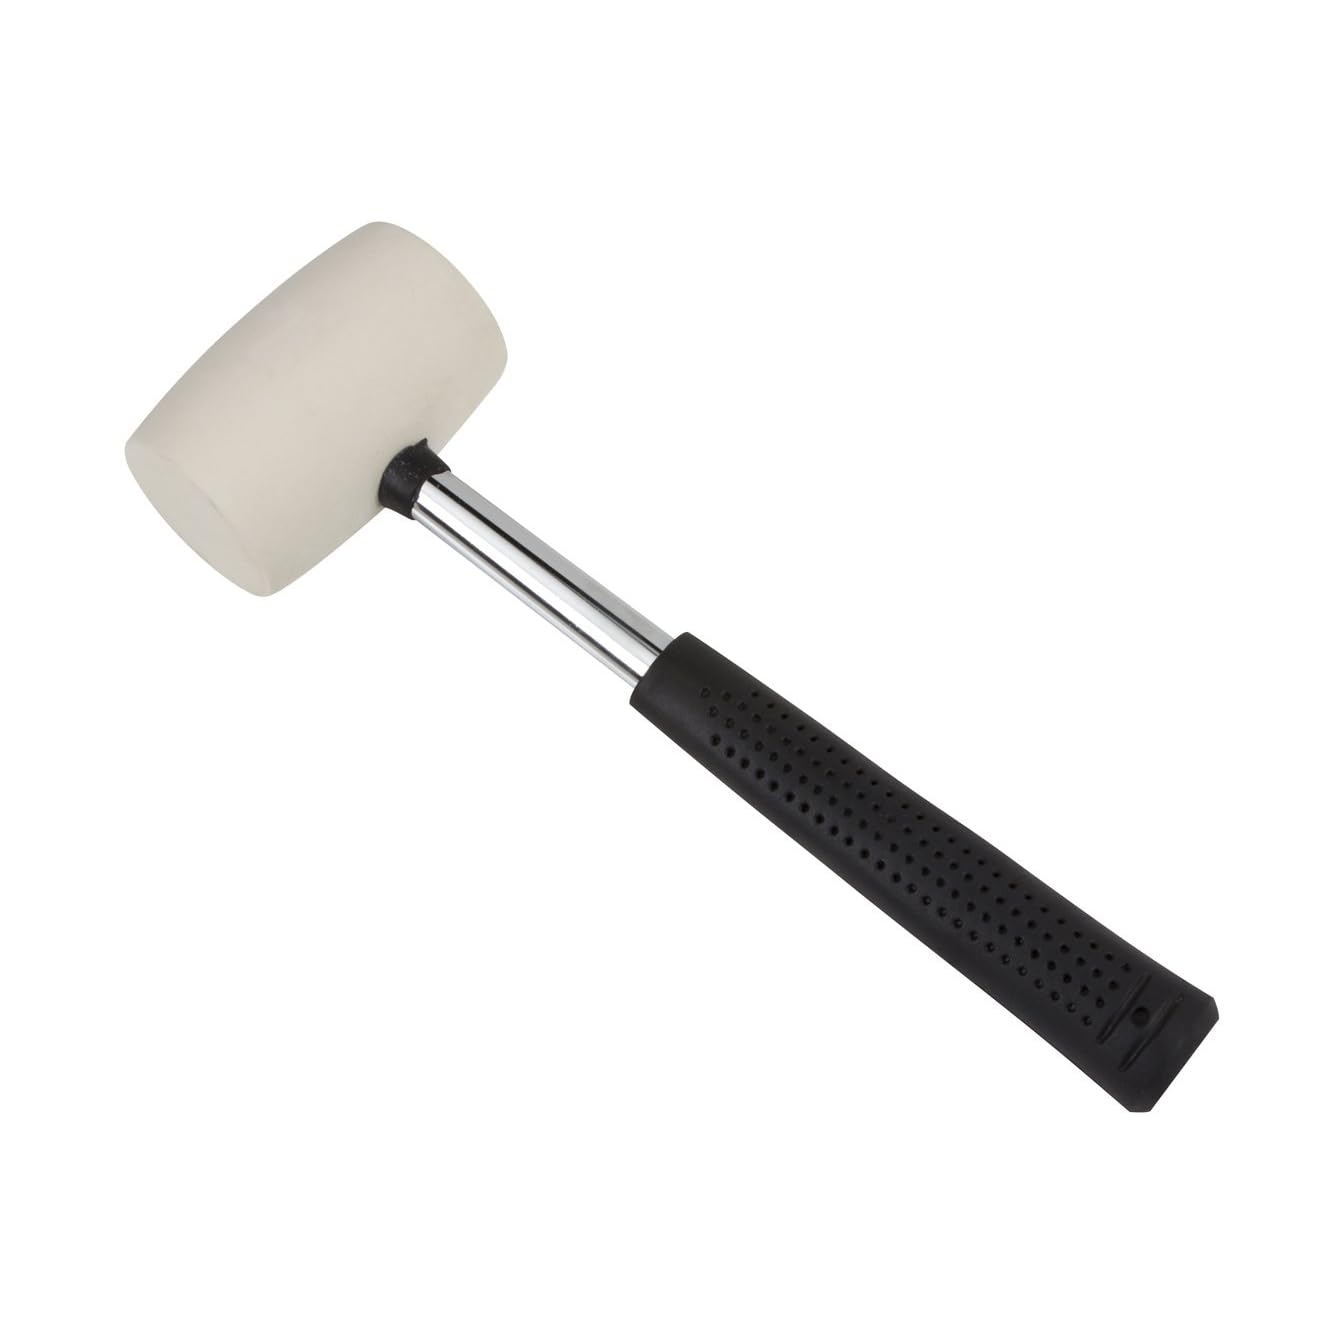
The nail head trim was my least favorite part.  If anyone is considering using nail head trim, please purchase one of these:

source

It made the job much easier, and it only costs about $6 at Joann's.

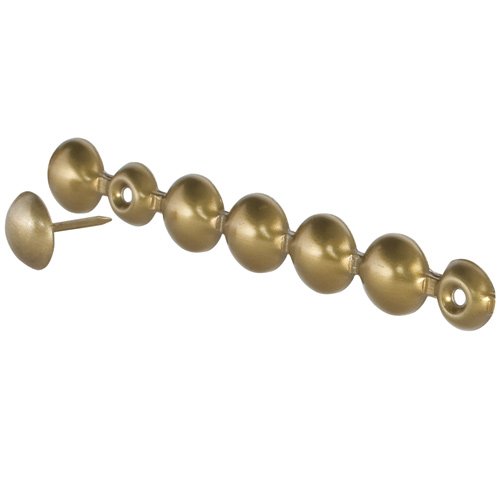
Next time, though, I think I'll splurge and buy this kind of nail head trim:

source
This is a 6' long piece of trim that you apply, hammering an additional nail every 5 nails.  It helps to keep the nails perfectly spaced and go in at the correct angle.  For $12, it might be worth it.

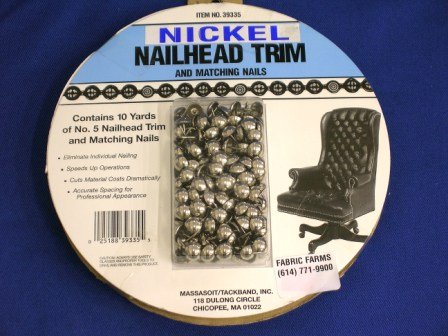
This kit, for $19, would also work:

source


You can see why this would be helpful for me:


I used a measuring device to place the nails equally apart, but even with that, they would hammer in the wrong angle, making them go in the wrong spot.  I probably should have gone back and fixed the ones that were incorrect, but the back of the chair faces the wall, so I'm going to live with it for now.  Plus, this way if I ever try nail head trim again, I can compare to my first nail head job.


Our Master Bedroom is coming together!  I'm still on the hunt for the perfect comforter/duvet.  And, I'm hoping to fix my bedskirt, which is not the right size and needs some ribbon to finish it off.  Slowly, slowly, things are getting done.  I hope to finish a lot of these final projects before our baby comes in July.  If I manage my time well, it should get accomplished in five months' time.

Happy Friday!

Linking to:
Furniture Feature Fridays

Friday, July 29, 2011

Slipcovered Parsons Chairs for the Dining Room

There have been tears, sweat, and yes, even some blood, while working on this project.  I am happy to report that my dining room chairs are complete!

After

Before
I've wanted parsons chairs for about a year now, and have been perusing Pottery Barn, World Market, and Ballard Designs to find my favorites.  When I realized I couldn't afford something brand new, I began scouring Craigslist for the right thing.  You can read about the ones I ended up finding here.  Six chairs needed some serious work!  Having little children and knowing that even grownups can sometimes make messes, I decided that slipcovers would be the most practical way to go.  But, I'd never made one before, so the task was a bit daunting.


Janell, over at Isabella and Max Rooms, had a post about her dining room chair re-do, and she used drop cloths to slipcover some chairs.  What a great idea!  The reason she used that convinced me was that drop cloths are pretty durable and could withstand lots of washing (which they would most likely need), so I decided to go that route.  And, I'm really pleased with how they turned out.


I have two different types of chairs, so I decided to make skirts for the four matching ones, and leave the other two with a simple hem for now.  I may decide to make skirts for those later on, but for now, it helps me keep them set apart, as the slipcovers are different sizes.


One thing I found interesting when I removed the fabric from the old chairs, was that each one had what looked like a plastic bag over the cushion/padding.  Having that does make putting the slipcover on easier, but I think it might have also been there to protect the padding from any spills.  I didn't really want trash bags on my chairs, so I purchased a vinyl tablecloth, cut it to size, and wrapped it around the seat of each chair, stapling it in place.  Hopefully, this will help in protecting the padding from unwanted spills and stains.


The only trouble with the vinyl is that sometimes the slipcover shifts when sitting in the chair.  Any suggestions?

I'm not giving a tutorial here on how to do this, because there's no way I could, but I will recommend two sources that were extremely helpful to me in this process:

First, Ana, from Ana White Homemaker, has a great tutorial on how to make slipcovers for a parsons chair (she also has designs for making the chair).  My chairs were different dimensions than hers, but the principles there were great to follow.

Secondly, Krisi from, Pink and Polka Dot, has a fabulous tutorial for making knife pleats, which I used for the skirt of these chairs.  Her tutorial is so simple to follow!  And, if you think you might be making a lot of slipcovers, there is also an e-book for sale that Krisi wrote, which you can find here.

Instead of a tutorial,  here are some 'hindsights' from this project.  Hopefully, this will be helpful for any who might try to tackle this kind of project.


1. Drop cloths come in different shades of color. Yes, even the same brand, same size, from the same store.  I purchased the largest drop cloth I could find and when I got through several of the chairs, realized I would need another one.  So, I bought it, washed it and when I laid it out to start cutting, realized that it was a different color.  Ugh!  It's not noticeable from a distance, but there was no way I could use that fabric for the skirts of the chairs I'd already completed.  Thankfully, I found the right shade after a few trips back to the store.  Just be sure you check before you purchase multiples.

2. Measure exact dimensions and cut to size.  Some people recommend draping the fabric over the chair, pinning and marking, allowing ample amounts of extra fabric.  This technique works for pieces with rounded arms and high backs, but with straight lines like a parsons chair, I found this to be more frustrating than anything, and it caused me to rip out the seams from at least 4 of the 6 slipcovers.  It was much easier to figure on 1/2-inch seam allowances for every seam, and measure my pieces 1-inch larger on all sides than the dimensions of my chair.  The sewing was simple then, and the slipcovers fit snugly around the seats.


3. Figure that it will take a long time.  I thought for sure I would be done with this project in a day or two.  WRONG!  The only thing I have to say for this tip is something my dad used to tell me when I was a little girl and wanted so badly to help him with projects.  He would smile at me, shake his head and say, "You can help, but it's harder than it looks."  So true!  Don't get frustrated with yourself if making a slipcover (especially if you're making 6 of them) takes more than a couple of days to complete.  Eventually it will be finished!

4.  Buy lots of thread.  Several times I ran out during this process, and it's not possible to run to the store while my children are napping.  I think I used 5 spools of heavy duty thread for this project.  (This might not have been necessary if I hadn't ripped 4 slipcovers apart to re-do.  Ha!).


Now we're ready for company and no one has to sit in a broken chair!  Let me know if you'd like to come for dinner!


Someone asked to see the new dining room light fixture lit up.  Here you go!  You can read about my $6 Knock off Pottery Barn chandelier here.

I'll be linking up to these parties:
Miss Mustard Seed Furniture Feature Fridays
Feathered Nest Friday, over at French Country Cottage
Show Me What Ya Got, at Not Just a Housewife

Tuesday, June 14, 2011

Re-Upholstery Tips and Dining Room Chair Progress

Demolition on the dining room chairs has come to an end!  Yay!  One of the most challenging aspects of a re-upholstery project is all of the prep-work that must take place before your piece can begin to be transformed.  Here are some tips in case you're thinking about tackling something like this.

1. ALWAYS remove the old fabric!!

Before


After

Not everyone does this, but I recommend it because you never know what substances might be buried in the fabric, or underneath it.  Sometimes it's even essential to remove the padding/foam and replace that as well.  Thankfully, for this project of mine, all foam is in great shape, so that will remain.

2. Take out any staples that you see in the area that you are re-doing.


This makes for a clean surface to sand, stain, and add new staples.  Your hands might hurt after this is done, but you'll be glad you did it. I'm sure there are some great upholstery tools for staple removal, but I just use a flat head screwdriver and needle-nose pliers.

3. Get someone to help you!  My husband graciously assisted me with this project and it made it go twice as fast.  He is the best when it comes to any DIY project around the house and I can't thank him enough!

When we removed the fabric from the legs of these chairs, we discovered that the wood was not of the best quality, and it is unfinished.


With a bit of sanding and some wood glue to fill in the staple holes, they'll be good to go!  We'll be staining the legs and then I can move on to the slipcovers.  Can't wait to have these chairs in my dining room!

Oh, and here's a little peak at my color inspiration for the dining room, in case you're curious :)


I'm linking this up to Home Stories A to Z link party.  Head on over there and check out Beth's blog and the tutorials and tips that others have posted!  I think you'll be inspired!