Showing posts with label paint tip. Show all posts

Tuesday, May 15, 2012

All You Need is a Little Paint

We have moved 4 times in our not quite 6 years of marriage, each time living in a different sized dwelling, using various combinations of our acquired home decor.  My color schemes have changed a few times over the years, and because of that some things that worked when we were first married just don't cut it now.  It's not in the budget to buy new items for each house, so instead I'm trying to work with what I have {as much as possible} and make it the best it can be for our home.  One of my recent discoveries is that if I don't like something the way it is, all I need is a little bit of paint, a few minutes, and I have a new look on an item that makes it fit in more perfectly with my home.

Exhibit A:


This picture was given to me before I was married and it hung in my bathroom.  We used it in our first home, but then it sat in a box in storage for 3 years.  I still like the picture but the gold frame was not my favorite.  I took out a sample paint that I had purchased on clearance at Home Depot {keep your eye out for these sales--I got samples for $0.50}, gave it a little coat, and in about 5 minutes I had some 'new' art for my downstairs bathroom.


The bathroom is not finished yet, I'm still waiting to paint the walls, maybe paint the cabinet, frame in the mirror and get some hand towels, but so far I haven't purchased anything new for this space, I just re-did some old items to make them go with my desired color scheme.

Exhibit B:

NO BEFORE PICTURE, SORRY!

I am pleased to say that I have kept a house plant alive for almost a year now--this truly is a miracle!  I never thought I'd be able to have plants in my house, because I'm notorious for not watering, or overwatering, and they never survive.  This plant was given to me by my mother-in-law, and it remained in the hunter green pot she used to start it for me for about 9 months.  Rather than buying a new pot {those things are expensive!}, my husband simply painted the green one with a coat of yellow paint {using another clearance sample paint, sprayed some white paint on the trellis, and it looks brand new.


The pop of yellow is just what I've been wanting in the kitchen and I love how simple it was to create something 'new'.  

So, look around your house for items that are still perfectly fine, but maybe they're old, worn, or just not the right color anymore.  Instead of going out to purchase something new to replace that item, grab a little paint and fix it up so that it looks perfect in your home!

Wednesday, February 29, 2012

4 Simple Painting Tips

The past week has been a flurry of projects as I'm trying to wrap up the major decor items in the girls' bedroom.  Thankfully, the painting is finished! {well, I should say it's almost finished.  There are about 24 inches of the highest part of the vaulted walls yet to be painted, but we're going to wait to get a taller ladder and do that at the same time as the nursery}.  My part is done, though!  I even had enough paint to paint the upstairs bathroom the same color!  Woohoo!!  Bye-bye builder's grade paint :)

Since I've had paint on the brain this week, I thought I would give you a few tips for painting.  I am by no means an expert painter, but I have learned a couple things that have been extremely helpful in my painting endeavors.

1. Use a handled cup with a magnetic bar for cutting in trim.  The first time I painted a room I think I used a plastic cup when I painted around the trim.  This proved to be quite messy, and definitely not professional.  When we moved into this house and started painting, we discovered these handy little paint 'mugs'.  There is a magnetic piece on the inside that your trim brush will stick to {the metal part} so that your brush and paint are all in one small and secure place.


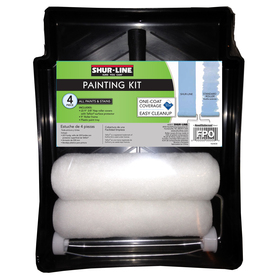
2. Purchase a teflon lined paint tray.  This has proven to be a wonderful investment for us!  Once the paint has dried in the pan, it pulls off so easily.  See image below for proof.


I don't know what brand we have, but here is one that I found on Lowes.com, in case you're looking to buy one.

via
3. Store paint laden rollers and brushes in ziploc bags in the fridge.  If you're painting a room and don't have time to do it all at one time, instead of washing out the rollers/brushes every time, simply put them in a bag, refrigerate, and they'll be ready to use when you have another spare moment.  I even used several plastic grocery bags for my roller this time, and it worked just fine.


4. Keep baby wipes handy for cleaning spills.  A wet rag or paper towel will work fine too, but I have found that baby wipes are perfect for wiping paint drips off of trim.

Just a few quick tips for you that will hopefully help save you some time when painting.

{For those who may be wondering, this is NOT the paint color that I used in the girls' bedroom!  This was a Glidden paint I received free last year and used it to paint the laundry room.  I haven't gotten any further than that in my laundry room, which is why you haven't seen any pictures of it on this little blog.  Maybe some day...}

What painting tips do you have?

Wednesday, February 15, 2012

Painting Tip: Paint Samples on the Wall

We moved into a new house last year, and slowly, but surely, we're getting rid of the builder grade paint that was in every room.  Some of the challenge for me has been the fact that our ceilings upstairs are quite high, so in order to paint the bedrooms {and the foyer/stairwell} we will need to rent a taller ladder.  So, I've put off painting upstairs because of that, and we don't have money in the budget to just go out and buy paint for every room of the house at once.

For Christmas this year I asked for gift cards to Lowe's {exciting, I know} so that I could purchase some paint to finish up the girls' bedroom.  With a new baby on the way, and plans to decorate the nursery, I really owe it to my daughters to decorate their room first.  I've had the color scheme in mind since we moved in, and the major portion of their bedding was purchased at TJMaxx last year, but the walls remain bare, and there are absolutely no accessories anywhere!  First step, though, is the paint, which is the purpose for this post.

My number one tip in choosing paint colors is:  PAINT SAMPLES ON THE WALL BEFORE MAKING A COLOR DECISION!!  Colors look completely different on the wall than they do on the paint swatch that you pick out at the store.


When we purchased our first home, in 2007, I desperately wanted a Tuscan yellow kitchen.  So, I bought all of my paint, covered the walls of the kitchen, only to discover that what I was hoping would look like Tuscany looked like a bright yellow school bus!  Ugh!  If only I had known then what I know now!

We went to Lowe's on Monday to buy some samples of paint, and I really liked all 3 colors.  I painted a little swatch of each on the wall, then sat down on Isabella's bed to take a look, and HATED. EACH. ONE.  What did I do?  Naturally, I did what any woman would do:  I sobbed.  Yes, I know, that's very shallow.  And the more I was crying about my dislike of the paint colors, I started to cry about the fact that I was crying over paint.  Has anyone else cried over decor decisions, or am I just really lame??


Bradley agreed that the colors weren't right, and so back to Lowe's I went during the girls' nap time, to pick out two more paint samples and put those on the wall.  Ah, one seemed to work!  But, here comes in tip #2 with the samples.

Not only should you paint the samples on the wall, but it's also good to leave the colors up for a while, so that you can see what they look in different kinds of light.  I left mine up for about 24 hours before heading back to the store to purchase the one I had decided on.

I didn't get their room painted this week, as I had planned, but at least I have the paint, I bought some fabric for pillows and a window treatment, and hopefully their room will be finished by the end of this month {that's the goal at least}.

What painting tips do you have?