Showing posts with label baking. Show all posts
Saturday, October 26, 2013
Day 26 :: Bake Something with Pumpkin
It's fall. The season for mums, pumpkins, sweaters, snuggling with your honey, and soup {not necessarily in that order}. And this morning when I got up it actually felt like fall. Our house is currently 65 degrees, so I had to turn on the heat. Those little babies upstairs need some warmth!
One way to thrive? Get in your kitchen and bake something. Since it's fall, bake something with pumpkin. Using one can of pumpkin you can make both of the recipes below. If you don't like pumpkin, certainly someone you know does, so take a loaf of bread to them, or wrap a few scones and deliver them to your neighbor.
Givers and receivers can both thrive!
Go, turn on your oven. It's pumpkin time.
Quick Pumpkin Bread
1 cup pumpkin
2 eggs
1 stick butter, melted
1/2 cup sour cream
1 teaspoon vanilla
1 1/2 cups flour
3/4 cup sugar
1 teaspoon cinnamon {original recipe calls for 2 teaspoons pumpkin pie spice}
1 teaspoon baking powder
1/2 teaspoon baking soda
1/2 teaspoon salt
1/2 cup Craisins {optional. You could also add 1/2 cup of any of the following: chocolate chips, pecans, walnuts, raisins, white chocolate chips}
Combine pumpkin, eggs, butter, sour cream and vanilla in a mixing bowl. In a separate bowl, mix together dry ingredients. Add dry ingredients to pumpkin mixture. Stir in Craisins. Bake in a greased 9x5-inch loaf pan at 350F for one hour.
Pumpkin Scones
2 cups flour
1/3 cup sugar
1 Tablespoon baking powder
1 teaspoon cinnamon {original recipe calls for 1 teaspoon pumpkin pie spice}
1 stick cold butter, cubed
2/3 cup pumpkin
3/4 cup half and half*
1/2 cup chocolate chips, optional
Whisk flour, sugar, baking powder and cinnamon in a medium sized mixing bowl. Cut in butter with a pastry blender. In a small bowl combine pumpkin and half and half. Stir pumpkin mixture into flour mixture until combined. Stir in chocolate chips, if desired.
Pat into an 8-inch square on a floured surface, then cut into 16 triangles. Transfer to a baking sheet and bake at 400F for 20 minutes.
*I used 3/4 cup cream, as recipe calls for, and the dough was too moist. I had to keep adding flour to my surface just to pat the dough out into a square. I would recommend trying 1/4 cream at first and see if that would suffice.
source: Food Network, October, 2013
For a list of all posts in this series go here.
Labels:
31 Days,
31 Days to Thrive,
baking,
pumpkin scones from scratch,
quick pumpkin bread,
recipe
Monday, July 18, 2011
Classic Sour Cherry Pie with Lattice Crust
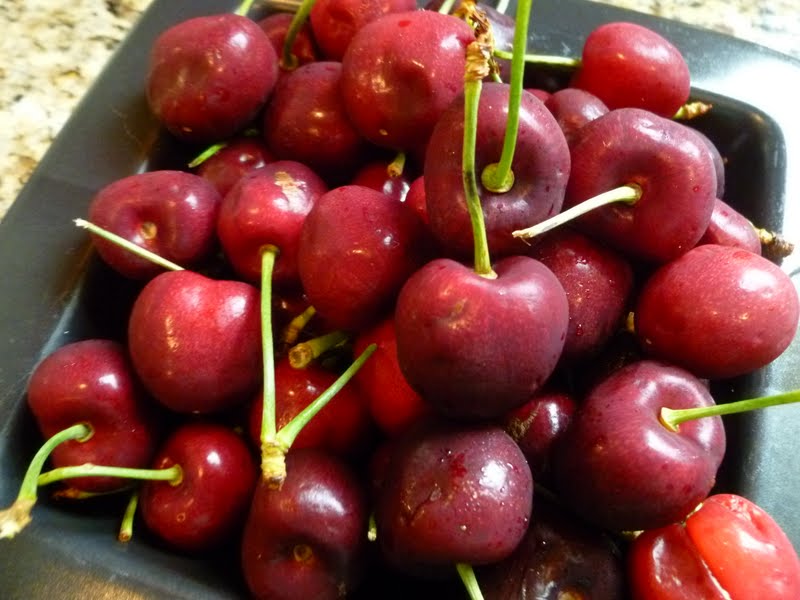
I never wrote down a Summer Bucket List, but a few things were on my mind to do this summer. One of them was to make a cherry pie with fresh cherries. The stores around us have been marking cherries down each week and this week they're even more on sale, so it must be cherry season somewhere in the Northwest! I'd encourage you to go buy some cherries and find some great recipes with cherries while the season lasts!
A lattice pie crust has always intimidated me because it looks so beautiful and I figured something like that must be super complicated. Good news: it's NOT! This pie is delicious, but I'll be honest, the crust makes it. I'm a sucker for a buttery crust, so I may or may not have scooped out the cherries in my slice last night and had pie crust and vanilla ice cream....
Recipe:
Crust:
2 1/2 cups all purpose flour
1 tablespoon sugar
3/4 teaspoon salt
1 cup (2 sticks) chilled unsalted butter, cut into 1/2-inch cubes
5 tablespoons ice water
Filling:
1 cup plus 1 tablespoon sugar
3 tablespoons cornstarch
1/4 teaspoon salt
5 cups whole pitted sour cherries or dark sweet cherries (about 2 pounds unpitted, whole cherries)
1 teaspoon fresh lemon juice (if using sour cherries) or 3 tablespoons fresh lemon juice (if using dark sweet cherries)
1/2 teaspoon vanilla extract
2 tablespoons unsalted butter, cut into 1/2-inch cubes
1 tablespoon milk
Vanilla ice cream
Crust:
Whisk flour, sugar, and salt in large bowl to blend. Add butter and rub it with your fingertips until small clumps form.
Add the water and stir with a fork until the dough gathers together. Gather dough into ball and divide into two balls. Place each ball into a piece of saran wrap, flatten into a disc and wrap.
Place in refrigerator for about 30 minutes. Let the dough soften a bit before rolling out.
Filling:
Preheat oven to 425F. Stir 1 cup sugar, cornstarch and salt in bowl, add cherries, lemon juice and vanilla.
On a floured surface, roll out one pie dough disc to a 12-inch round.
Place in a deep dish pie plate. Trim the hanging crust to about 1/2-inch. Roll out the second dough disc into a 12-inch round. Using a butter knife, cut into 10 strips, about 3/4-inch each. Pour filling into pie-lined dish and dot with butter.
Place 5 crust strips on top of filling. One by one, weave the remaining 5 crust strips so that you have a lattice pattern.
Fold bottom crust up over side of the lattice crust topping and crimp the edges to seal.
Brush lattice crust (not the edges) with milk and then sprinkle with the remaining 1 tablespoon sugar.
Place pie on a rimmed baking sheet (just in case some juice spills out) and bake 15 minutes. Reduce oven temperature to 375F. Bake for 1 hour more, or until pie filling is bubbling and crust is golden brown. Cover the crust edges with foil if it is starting to brown too quickly. Remove from oven. Cool completely.
Serve with vanilla ice cream.
Source: Bon Appetit, June 2008
A lattice pie crust has always intimidated me because it looks so beautiful and I figured something like that must be super complicated. Good news: it's NOT! This pie is delicious, but I'll be honest, the crust makes it. I'm a sucker for a buttery crust, so I may or may not have scooped out the cherries in my slice last night and had pie crust and vanilla ice cream....
Recipe:
Crust:
2 1/2 cups all purpose flour
1 tablespoon sugar
3/4 teaspoon salt
1 cup (2 sticks) chilled unsalted butter, cut into 1/2-inch cubes
5 tablespoons ice water
Filling:
1 cup plus 1 tablespoon sugar
3 tablespoons cornstarch
1/4 teaspoon salt
5 cups whole pitted sour cherries or dark sweet cherries (about 2 pounds unpitted, whole cherries)
1 teaspoon fresh lemon juice (if using sour cherries) or 3 tablespoons fresh lemon juice (if using dark sweet cherries)
1/2 teaspoon vanilla extract
2 tablespoons unsalted butter, cut into 1/2-inch cubes
1 tablespoon milk
Vanilla ice cream
Crust:
Whisk flour, sugar, and salt in large bowl to blend. Add butter and rub it with your fingertips until small clumps form.
Add the water and stir with a fork until the dough gathers together. Gather dough into ball and divide into two balls. Place each ball into a piece of saran wrap, flatten into a disc and wrap.
Place in refrigerator for about 30 minutes. Let the dough soften a bit before rolling out.
Filling:
Preheat oven to 425F. Stir 1 cup sugar, cornstarch and salt in bowl, add cherries, lemon juice and vanilla.
On a floured surface, roll out one pie dough disc to a 12-inch round.
Place in a deep dish pie plate. Trim the hanging crust to about 1/2-inch. Roll out the second dough disc into a 12-inch round. Using a butter knife, cut into 10 strips, about 3/4-inch each. Pour filling into pie-lined dish and dot with butter.
Place 5 crust strips on top of filling. One by one, weave the remaining 5 crust strips so that you have a lattice pattern.
Fold bottom crust up over side of the lattice crust topping and crimp the edges to seal.
Brush lattice crust (not the edges) with milk and then sprinkle with the remaining 1 tablespoon sugar.
Place pie on a rimmed baking sheet (just in case some juice spills out) and bake 15 minutes. Reduce oven temperature to 375F. Bake for 1 hour more, or until pie filling is bubbling and crust is golden brown. Cover the crust edges with foil if it is starting to brown too quickly. Remove from oven. Cool completely.
Serve with vanilla ice cream.
Source: Bon Appetit, June 2008
Sunday, July 3, 2011
Cappucino Eclairs
Eclairs have always been one of my favorite things to purchase from a bakery, so when I came across this recipe I tucked it away to try one day. If you like coffee and chocolate, this is for you. The coffee flavor of the cream filling is a bit strong, so be prepared, but otherwise I found this to be quite delicious. The process of making any pastry is time consuming, but it's definitely something worth trying and isn't as complicated as it might appear.
Also, don't forget to enter the Burlap Giveaway that's going on! Some readers have mentioned that they're not quite sure how to follow a blog. I'm working on a brief tutorial that I hope to have up by tomorrow for those who might be interested. If you have questions, though, feel free to contact me at onlyfromscratch@gmail.com and I can try to help you out!
Ingredients
Filling:
2 cups water
2 cups water
1 cup finely ground coffee beans
1 teaspoon vanilla
1 tablespoon heavy whipping cream
5 tablespoons sugar
1 tablespoon cornstarch
2 large egg yolks
1/4 cup (1/2 stick) unsalted butter, diced
Dough:
1 cup water
6 tablespoons unsalted butter, diced
3/4 teaspoon salt
1 cup flour
4 large eggs
4 ounces milk chocolate, melted
powdered sugar
Brew 2 cups water and coffee in a standard coffeemaker.
Whisk sugar and cornstarch in medium bowl, then whisk in yolks.
Pour 1 cup brewed coffee into heavy medium saucepan. Add vanilla and cream. Bring mixture to a boil.
Gradually whisk hot coffee mixture into yolk mixture.
Return to same saucepan and cook until cream thickens and boils, stirring constantly, about 3 minutes. Add butter and whisk to melt. Transfer the cream to a small bowl. Press plastic wrap directly on top of cream and chill for at least 3 hours, and up to 2 days.
Bring 1 cup water, butter and salt to boil in heavy medium saucepan over medium-high heat. Add flour all at once; using wooden spoon, stir until dough forms ball and thick film coats bottom of pan, about 2 minutes.
| Should look like this. |
Remove from heat. Using a handheld mixer beat in eggs, 1 at a time, until dough is smooth after each addition.
Spoon dough into pastry bag fitted with 1/2 inch plain round tip (If you don't have a pastry bag, place the dough in a large Ziploc bag. Cut a hole in one bottom corner, about a 1/2-inch in diameter--this works just as well).
Preheat oven to 400F. Line a baking sheet with parchment paper. Press a dot of dough under each corner of parchment to keep paper on the sheet.
Pipe 4-inch lines of dough onto paper, about 1 1/2 inches apart.
*Note: Yours should look a little larger than this. I cut my hole too small, so I had to go back over mine and add more dough on the top, so just be sure to cut the hole on the bag the right size!
Bake 15 minutes (do not open oven). Reduce temperature to 350F; bake until crisp, about 20 minutes.
| Some of mine were a bit doughy on the inside, so they may need 20-25 minutes. |
Using serrated knife and starting at 1 long side, cut each shell in half.
| The insides should be somewhat hollow, like this, if the dough is cooked all the way. |
Fill shell bottom with 2 tablespoons filling. (Don't use more than this or you will run out. If you like your eclairs with LOTS of cream filling, just double the filling recipe).
Cover with top.
Spread with melted chocolate. (Melt chocolate in microwave for 30 seconds. Check to see if melted and stir. Continue melting in 15 second increments until it is smooth).
Dust lightly with powdered sugar. Makes 12.
Source: adapted from Bon Appetit, September 2008
Monday, June 27, 2011
Chocolate Peanut Butter Cookies
Chocolate and peanut butter has to be one of the greatest dessert combinations ever invented. These cookies are more proof of that fact. Grab a glass of milk and enjoy!
Recipe:
1 1/2 cups all-purpose flour
1/2 cup unsweetened cocoa powder
1/2 teaspoon baking soda
1/2 cup butter, softened
1/2 cup, plus 2 tablespoons sugar
1/2 cup packed brown sugar
3/4 cup peanut butter
1 egg
1 tablespoon milk
1 teaspoon vanilla
3/4 cup powdered sugar
In a medium bowl stir together flour, cocoa powder, and baking soda. Set aside. In a large mixing bowl combine butter, the 1/2 cup granulated sugar, brown sugar, and 1/4 cup of the peanut butter; beat with mixer until combined. Add egg, milk, and vanilla; beat well. Beat in as much flour mixture as you can with the mixer. Using a wooden spoon, stir in any remaining flour mixture. Shape dough into 28 balls, each about 1 1/4 inches. Set aside.
For the filling, in a bowl combine powdered sugar and remaining 1/2 cup peanut butter. With mixer beat until smooth; knead by hand if necessary. Shape into 28 balls.
Preheat oven to 350F. On work surface, flatten a chocolate dough ball; top with peanut butter ball, completely covering peanut butter ball; reshape into ball. Repeat with remaining balls.
Place balls 2 inches apart on a cookie sheet. Flatten with bottom of a glass dipped in the 2 tablespoons sugar. Bake 8-9 minutes. Let stand 1 minute, then transfer to racks to cool..
Source: Better Homes and Gardens, March 2007
Monday, May 16, 2011
Banana Bread with Cinnamon Crumble Topping
Bananas are a staple around our household, so there are always bananas at varying stages of ripeness in the fruit bowl, which means we eat banana bread frequently. I usually stick to my favorite recipe, but I was looking through some Bon Appetit recipes that I had saved, and came across this new one. We all loved it, especially the sugary/cinnamon top.
Ingredients:
1 1/2 cups all purpose flour
1 cup plus 2 tablespoons sugar
2 teaspoons ground cinnamon, divided
1 teaspoon baking soda
1/2 teaspoon salt
1 cup mashed ripe bananas (2-3 medium)
2 large eggs
1/2 cup vegetable oil
1/4 cup honey
1/4 cup water
2 1/2 tablespoons (packed) brown sugar
Preheat oven to 350. Butter and flour 9x5x3-inch bread pan. Mix bananas, eggs, oil, honey and water in large mixing bowl. Stir in flour, 1 cup sugar, 1 teaspoon cinnamon, baking soda and salt. Mix until combined. Pour batter into pan. Mix the remaining 2 tablespoons sugar, 1 teaspoon cinnamon, and brown sugar in a small bowl. Sprinkle this evenly over the batter.
Bake bread until a knife inserted in the center comes out clean, about 1 hour. Cool bread in pan for 30 minutes, then carefully remove bread from pan, trying not to shake off the topping.
*Recipe adapted from Bon Appetit, September 2008
Subscribe to:
Posts (Atom)