Can anyone tell me where this line comes from? Any literature gurus out there want to explain its meaning?
In short, it means covering all kinds of subjects, which is what this post is doing. There are just a few updates I wanted to give you, but wanted to include them all in one post.
First, we finally named the dog! In honor of our current state of residence: GEORGIA. Thank you, everyone for your name ideas. My husband and I read and considered each and every one. Nothing seemed just right, though, so until yesterday we just called her "Puppy". It's rather hard to switch over to her new name now, but I'm working on it. Just in case you didn't see a picture of her before, here she is:
Second, my dining room chair slipcovers are finished!!! Seriously, I thought I would never be done with these. My dining room table is now cleared of the sewing machine, the fabric and pins are put away, and I can simply relax a bit more. I'm not ready to give a full reveal, but here's a sneak peek:
Third: Thanks for all of the comments and suggestions about the dining room lighting. I've decided to go with the burlap and started cutting some of that out today.
It's been difficult for me, but I've been holding off on my list of other projects until the slipcovers were complete. Now that they're done, I get to move on!
Fourth: I'll be posting a couple more cherry recipes today and tomorrow, so if you haven't done so already, go BUY SOME CHERRIES!! They are in season now, and even though they're still a bit expensive, trust me you won't be disappointed at the flavor they add to even main dishes.
Off to cook dinner now with my 2 1/2 year old who for some reason thinks that nap time is only one hour long this week!!
Tuesday, July 19, 2011
Monday, July 18, 2011
Classic Sour Cherry Pie with Lattice Crust
I never wrote down a Summer Bucket List, but a few things were on my mind to do this summer. One of them was to make a cherry pie with fresh cherries. The stores around us have been marking cherries down each week and this week they're even more on sale, so it must be cherry season somewhere in the Northwest! I'd encourage you to go buy some cherries and find some great recipes with cherries while the season lasts!
A lattice pie crust has always intimidated me because it looks so beautiful and I figured something like that must be super complicated. Good news: it's NOT! This pie is delicious, but I'll be honest, the crust makes it. I'm a sucker for a buttery crust, so I may or may not have scooped out the cherries in my slice last night and had pie crust and vanilla ice cream....
Recipe:
Crust:
2 1/2 cups all purpose flour
1 tablespoon sugar
3/4 teaspoon salt
1 cup (2 sticks) chilled unsalted butter, cut into 1/2-inch cubes
5 tablespoons ice water
Filling:
1 cup plus 1 tablespoon sugar
3 tablespoons cornstarch
1/4 teaspoon salt
5 cups whole pitted sour cherries or dark sweet cherries (about 2 pounds unpitted, whole cherries)
1 teaspoon fresh lemon juice (if using sour cherries) or 3 tablespoons fresh lemon juice (if using dark sweet cherries)
1/2 teaspoon vanilla extract
2 tablespoons unsalted butter, cut into 1/2-inch cubes
1 tablespoon milk
Vanilla ice cream
Crust:
Whisk flour, sugar, and salt in large bowl to blend. Add butter and rub it with your fingertips until small clumps form.
Add the water and stir with a fork until the dough gathers together. Gather dough into ball and divide into two balls. Place each ball into a piece of saran wrap, flatten into a disc and wrap.
Place in refrigerator for about 30 minutes. Let the dough soften a bit before rolling out.
Filling:
Preheat oven to 425F. Stir 1 cup sugar, cornstarch and salt in bowl, add cherries, lemon juice and vanilla.
On a floured surface, roll out one pie dough disc to a 12-inch round.
Place in a deep dish pie plate. Trim the hanging crust to about 1/2-inch. Roll out the second dough disc into a 12-inch round. Using a butter knife, cut into 10 strips, about 3/4-inch each. Pour filling into pie-lined dish and dot with butter.
Place 5 crust strips on top of filling. One by one, weave the remaining 5 crust strips so that you have a lattice pattern.
Fold bottom crust up over side of the lattice crust topping and crimp the edges to seal.
Brush lattice crust (not the edges) with milk and then sprinkle with the remaining 1 tablespoon sugar.
Place pie on a rimmed baking sheet (just in case some juice spills out) and bake 15 minutes. Reduce oven temperature to 375F. Bake for 1 hour more, or until pie filling is bubbling and crust is golden brown. Cover the crust edges with foil if it is starting to brown too quickly. Remove from oven. Cool completely.
Serve with vanilla ice cream.
Source: Bon Appetit, June 2008
A lattice pie crust has always intimidated me because it looks so beautiful and I figured something like that must be super complicated. Good news: it's NOT! This pie is delicious, but I'll be honest, the crust makes it. I'm a sucker for a buttery crust, so I may or may not have scooped out the cherries in my slice last night and had pie crust and vanilla ice cream....
Recipe:
Crust:
2 1/2 cups all purpose flour
1 tablespoon sugar
3/4 teaspoon salt
1 cup (2 sticks) chilled unsalted butter, cut into 1/2-inch cubes
5 tablespoons ice water
Filling:
1 cup plus 1 tablespoon sugar
3 tablespoons cornstarch
1/4 teaspoon salt
5 cups whole pitted sour cherries or dark sweet cherries (about 2 pounds unpitted, whole cherries)
1 teaspoon fresh lemon juice (if using sour cherries) or 3 tablespoons fresh lemon juice (if using dark sweet cherries)
1/2 teaspoon vanilla extract
2 tablespoons unsalted butter, cut into 1/2-inch cubes
1 tablespoon milk
Vanilla ice cream
Crust:
Whisk flour, sugar, and salt in large bowl to blend. Add butter and rub it with your fingertips until small clumps form.
Add the water and stir with a fork until the dough gathers together. Gather dough into ball and divide into two balls. Place each ball into a piece of saran wrap, flatten into a disc and wrap.
Place in refrigerator for about 30 minutes. Let the dough soften a bit before rolling out.
Filling:
Preheat oven to 425F. Stir 1 cup sugar, cornstarch and salt in bowl, add cherries, lemon juice and vanilla.
On a floured surface, roll out one pie dough disc to a 12-inch round.
Place in a deep dish pie plate. Trim the hanging crust to about 1/2-inch. Roll out the second dough disc into a 12-inch round. Using a butter knife, cut into 10 strips, about 3/4-inch each. Pour filling into pie-lined dish and dot with butter.
Place 5 crust strips on top of filling. One by one, weave the remaining 5 crust strips so that you have a lattice pattern.
Fold bottom crust up over side of the lattice crust topping and crimp the edges to seal.
Brush lattice crust (not the edges) with milk and then sprinkle with the remaining 1 tablespoon sugar.
Place pie on a rimmed baking sheet (just in case some juice spills out) and bake 15 minutes. Reduce oven temperature to 375F. Bake for 1 hour more, or until pie filling is bubbling and crust is golden brown. Cover the crust edges with foil if it is starting to brown too quickly. Remove from oven. Cool completely.
Serve with vanilla ice cream.
Source: Bon Appetit, June 2008
Saturday, July 16, 2011
Book Recommendation
About two weeks ago I was looking through my status updates on Facebook, and came across a link for a book that sounded great. Feeling especially overwhelmed and inadequate as a parent that day, I quickly went to Amazon and ordered the book. I have NOT been disappointed! Because this book is centered around the Gospel, it not only gives insights into parenting, it also challenges my faith, encouraging me to fear God more.
I've only read a few chapters, so I can't speak for the book in its entirety, but of what I've read thus far, I would highly recommend it. There are discussion questions at the end of each chapter, so it could easily be turned into a small group study book. Hope you enjoy it as much as I am!
If you are interested in purchasing, simply click on the picture and it will take you directly to Amazon.
Friday, July 15, 2011
Meal Planning Part 1: Stocking the Pantry
This is the first post of a 3-part series in which I will attempt to share some insights on how to plan meals. Planning for meals is a way to be more frugal, efficient and organized about something that takes place every day in your home. When I started thinking about doing a post on meal planning, I realized that there are some background topics that go into my meal planning, so I wanted to be sure to include those. Hope you enjoy this series and maybe even learn something along the way.
Stocking the Pantry
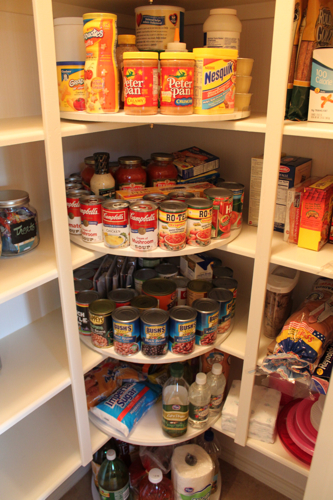
Several years ago I clipped a page from a Better Homes and Gardens magazine that inspired me for the day when I would have a pantry. When we moved into this house, I pulled it out and got started. Here are some pictures of my inspiration:
1. Baking Supplies:
Stocking the Pantry
Several years ago I clipped a page from a Better Homes and Gardens magazine that inspired me for the day when I would have a pantry. When we moved into this house, I pulled it out and got started. Here are some pictures of my inspiration:
I liked the idea of zones in the pantry, so I try to stick to those zones and it truly does help me in keeping organized and being able to find what I'm looking for in a hurry. You'll see photos of my zones below. Everyone's pantry will obviously look different, as we all have different tastes, family sizes, and eating lifestyles. My pantry lists are items that I always keep on hand, and having these enables me to cook and bake from scratch.
1. Baking Supplies:
flour (all-purpose)
sugar
brown sugar
cocoa powder
powdered sugar
yeast
chocolate chips
butter Crisco sticks
corn meal
Shortening (although you can store this in the fridge as well)
Chocolate baking squares (unsweetened)
Unflavored gelatin
Vegetable oil
Corn Syrup
Corn Syrup
With these ingredients you have what is necessary to make anything from biscuits to elaborate cakes, even at the last minute. I store all of the smaller baking supplies in a basket in my pantry, so that they are contained and I can easily find what I'm looking for and know what needs to be replaced.
The larger quantities of these staples I have stored in airtight containers.
| Baking Supplies Basket (needs some replenishing!) |
The larger quantities of these staples I have stored in airtight containers.
Vegetables
Diced Tomatoes
Crushed Tomatoes
Tomato Paste
Diced Tomatoes
Crushed Tomatoes
Tomato Paste
Fruits
Salad Dressing
Condiments
Olive Oil
Vinegar (balsamic, red wine, white)
Cooking Wine
Sherry
Cooking Wine
Sherry
Some of these items are obviously stored in the refrigerator once opened, but it's always great to have extras in your pantry in case you run out. My last kitchen only had 2 cabinets where I could store food, so I wasn't able to do as much 'stocking up' on these types of items. I did, however, always keep tabs on what was running low in my fridge.
3. Dry Goods
Pasta (all varieties)
Tortillas
Cereal
Oatmeal
Grits
Syrup
Crackers
Rice
Dried Beans
Peanut Butter
Honey
Our evening meals usually consist of a meat, a starchy side, and a vegetable. Since I always have various types of pasta, rice, and grits in my pantry, it's easy to create different side dishes. Risotto, Macaroni & Cheese, Noodles with Butter and Seasonings, Cheese Grits, Rice Pilaf are just some examples.
There you have it! That's how my pantry is stocked. One day I hope to have stylish containers for all of my goods (I'm currently saving up jars to make more of my chalkboard jars) but for now, this system works just fine!
Here are some photos of some amazingly organized stocked pantries. Click on the links to read about some awesome pantry transformations. Hope you feel inspired!
![]() |
| House of Smiths |
| Home Stories A to Z |
| Decor Chick |
Thursday, July 14, 2011
Paula Deen's Baked French Toast Casserole
Knowing that this recipe comes from Paula Deen, do you even have to wonder at its goodness? Simple, delicious, buttery, and sweet.
Recipe:
1 loaf French bread
8 large eggs
2 cups half-and-half
1 cup milk (I used 1 1/2 cups of half-and-half and 1 1/2 cups milk)
2 tablespoons sugar
1 teaspoon vanilla extract
1/4 teaspoon ground cinnamon
1/4 teaspoon ground nutmeg
Dash salt
Praline Topping (recipe below)
Syrup
Slice French bread into 20 slices, 1-inch thick each. Arrange slices in two layers, in a generously greased 13x9-inch baking pan, overlapping the slices. In a large bowl, using a wire whisk, combine the eggs, half-and-half, milk, sugar, cinnamon, nutmeg and dash of salt. Once combined, pour over bread slices, making sure that each slice is covered by the egg mixture. Cover with with foil and refrigerate overnight.
The next day, preheat oven to 350F.
Spread Praline Topping evenly over the top and bake for 40 minutes, until puffed and lightly golden. Serve with syrup (and butter if you must).
Praline Topping:
1 cup butter (2 sticks)
1 cup packed light brown sugar
1 cup chopped pecans
2 tablespoons light corn syrup (I used dark and it was fine)
1/2 teaspoon ground cinnamon
1/2 teaspoon ground nutmeg
Soften butter in microwave for 20-30 seconds (you don't want it melted). Mix all ingredients together and combine well.
*I made the praline topping the night before, placed it in a covered, microwaveable bowl, and simply heated for 30 seconds in the microwave before spreading on top. This made it easier to spread.
Source: Paula Deen, Food Network
Wednesday, July 13, 2011
Dining Room Lighting
Believe it or not, my dining room chairs are almost done. I thought the day would never come, but I think tomorrow the slipcovers will be finished!
Now that I have paint on the walls and the chairs are almost done, I've moved onto some of the other elements in the room. I wasn't planning to change the chandelier right now, simply because of how expensive it would be to get what I really wanted. The light fixture is brand new, it came with the house, but I've always felt like it was lacking something, sort of naked, you could say.
| Current light fixture |
It needs a little dressing up, and I've always liked the shades that I've seen online, but the ones I like run around $20 a piece, which would mean I'd spend $100 on 'fixing' my chandelier. There's no way I'm going to do that to a brand new fixture, so guess what? I was in Goodwill yesterday and found 6 of the same lamp shades, just the size that I need for this fixture! At $1.01 a piece (why do they add 1 cent to everything??), I couldn't resist!
However, they also need a bit of dressing up. Here's what I'm considering:
This would add a new element of texture to the room, but I'm not exactly sure how to recreate it:
| via Ballard Designs |
This would be simple, and I think I might have some linen on hand.
| via Ballard Designs |
Same as above just with a contrast trim.
| via Ballard Designs |
| via Pottery Barn |
Another option for some added texture.
| via Pottery Barn |
Could burlap not be an option? I know I have enough and I even have some burlap trim that I picked up at a fabric warehouse in Pennsylvania last month. Hmmm...
| via Pottery Barn |
Labels:
decorating,
dining room,
goodwill finds,
inspiration
Tuesday, July 12, 2011
Crockpot Breakfast Casserole
Today was my husband's turn to bring breakfast for the weekly men's Bible study he attends at our church. They meet at 6AM, so I was excited when I found a breakfast casserole that could cook in the crock pot overnight!! There is now no need to get up super early to put your pre-made, refrigerated overnight, takes more time to cook than you think because it's cold, breakfast casserole in the oven just in time to feed a hungry morning crowd. Simply put all the ingredients together the night before, dump in the crock pot, and enjoy the smells coming from your kitchen when you wake up the next morning.
Recipe:
32 oz. bag of frozen hash brown potatoes
1 lb. sausage
1 onion, chopped
1 can green chilies
1 small can pimentos, drained
2 cups shredded cheddar cheese
12 eggs
1 cup milk (I used whole)
1/2 teaspoon salt
1/2 teaspoon pepper
Spray the inside of the crock pot with non-stick cooking spray, or use a crock pot liner (which, by the way, are wonderful!). In a large skillet, cook sausage, breaking up so that there are sausage crumbles. When it is almost all the way browned, add the onion and saute' a few minutes longer. Add green chilies and pimentos to skillet. Remove from heat.
Dump 1/3 of the potatoes into the bottom of the crock pot. Top with 1/3 of the meat mixture, then 1/3 of the cheese. Repeat the layers, ending with the cheese.
Whisk together eggs, milk, salt and pepper, in a medium-sized bowl. Pour over the ingredients in the crock pot. Place the lid on top. Cook on LOW for 7-8 hours. Serves 12
Source: slightly adapted from Linda Larsen on Busy Cooks, About.com
Recipe:
32 oz. bag of frozen hash brown potatoes
1 lb. sausage
1 onion, chopped
1 can green chilies
1 small can pimentos, drained
2 cups shredded cheddar cheese
12 eggs
1 cup milk (I used whole)
1/2 teaspoon salt
1/2 teaspoon pepper
Spray the inside of the crock pot with non-stick cooking spray, or use a crock pot liner (which, by the way, are wonderful!). In a large skillet, cook sausage, breaking up so that there are sausage crumbles. When it is almost all the way browned, add the onion and saute' a few minutes longer. Add green chilies and pimentos to skillet. Remove from heat.
Dump 1/3 of the potatoes into the bottom of the crock pot. Top with 1/3 of the meat mixture, then 1/3 of the cheese. Repeat the layers, ending with the cheese.
Whisk together eggs, milk, salt and pepper, in a medium-sized bowl. Pour over the ingredients in the crock pot. Place the lid on top. Cook on LOW for 7-8 hours. Serves 12
Source: slightly adapted from Linda Larsen on Busy Cooks, About.com
Subscribe to:
Posts (Atom)