Wednesday, March 7, 2012

Color Schemes with Green

Sorry I've been absent for a few days!  Our weekends are Sunday-Tuesday around here, so some weeks I get so caught up with how we're spending our days off that I forget to blog!  I didn't even really get on the computer at all over the past few days {which honestly was great} so I have some catching up to do, plus some posts I'd like to share with you.

My desire was to have the girls' bedroom finished by the end of February.  It didn't happen.  So, instead of showing you a reveal today, I decided to share with you something that encouraged me while I was in the midst of decorating their space.

I received my Better Homes & Gardens magazine last week, and when I looked at the pictures of some of the color schemes for 2012, I started smiling.  Have you ever opened a magazine to discover that your color choices/decorating choices are actually trends??  This doesn't happen to me often, but it did this time, and really affirmed my choices.  I'm not always confident when it comes to decorating, as I've had no training in interior design, I'm not artsy in the least, and so I just don't always feel like my choices are the best.  I was really encouraged to discover that the colors I had picked for the girls' room are in right now!  Yay!  Until I can show you pictures of their actual room, here are some photos that will give you a glimpse of the color scheme I'm going with.

BHG

BHG
BHG
BHG
BHG
I'm off to Bible study this morning {we're doing a phenomenal study in the book of James}, and then I'm hoping that the girls' nap time this afternoon will mean getting a few more things done for me!  I haven't been sleeping well lately, so nap times have been spent snoozing for me, too.  With only 7 weeks left until this baby comes, though, I need to get moving on my to-do list!

  What do you have planned for today?


Friday, March 2, 2012

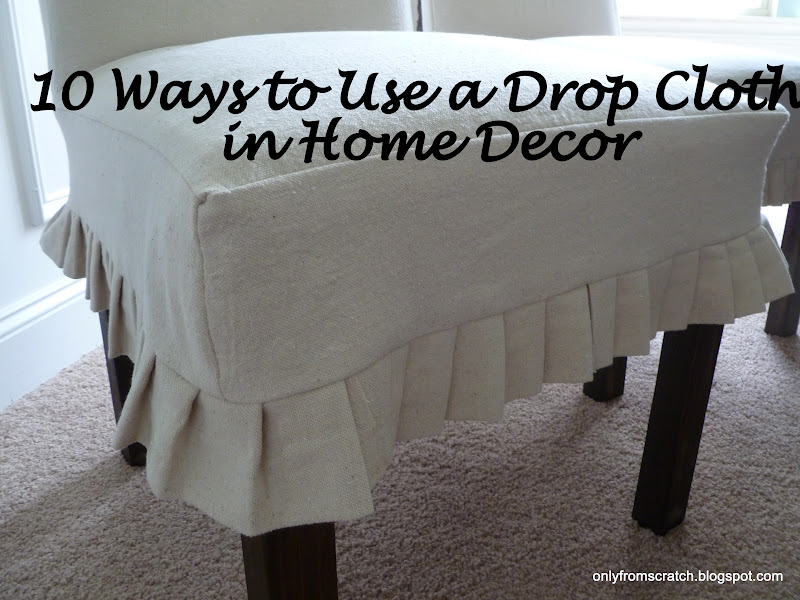
10 Ways to Use a Drop Cloth in Home Decor


Today I'm sharing with you 10 Ways to Use a Drop Cloth in Home Decor.  Maybe you've seen all, or some of these, before, but I thought I would provide you with some inspiration all in one place for some new project ideas.  Drop cloths are great because they're inexpensive, durable, huge, and versatile!  The possibilities are really endless of what you could do, but here are just some of the ways to incorporate them into your decor.

1. Drop Cloth Slipcovers

via
Inspired by many others who have used drop cloth fabric for slipcovers, I made these covers for my dining room chairs last summer.  They have held up quite nicely in the wash, and I love them!

2. Drop Cloth Grain Sack Cushions

via
These bar stool cushions make the perfect addition to a kitchen, especially if you're having trouble deciding on a fabric!

3. Drop Cloth Placemats

via

Jenna, from SAS Interiors, made some simple, yet elegant, placemats for her Christmas table.

4. Drop Cloth Shower Curtain

via

Traci, from Beneath My Heart, made a pretty shower curtain using a stencil and paint.  I love the clean, crisp look this adds to a bathroom.

5. Drop Cloth Thankful Tablecloth


Becca, from Blue Cricket Design, made this tablecloth for her Thanksgiving table using a drop cloth and a sharpie.  You could also make tablecloths for birthdays, Christmas, showers, and any other special occasion.

6. Drop Cloth Advent Calendar

via

My advent calendar is one of my favorite holiday decor items.  In all honesty, I never finished writing out the verses and activities for us to do during Advent, but trust me, by December 1, 2012, that will be done!

7. Drop Cloth Stenciled Drapery Panels

via
Carmel, from Our Fifth House, created some gorgeous drapes with stencils and paints.  Aren't they stunning?  You could also easily create a striped pattern using painter's tape.

8. Drop Cloth Ruffled Tree Skirt


Marian, aka Miss Mustard Seed, made a ruffled tree skirt out of a drop cloth and some linen.  Her tutorial can be found on HGTV.com.  {If you've been hanging around here for awhile, you'll remember that I made one sort of like this out of canvas for my Christmas tree last year.  You can read about it here}.

9. Drop Cloth Pictures

via
Sharyl, from The Little Brown House, gives a fantastic tutorial on how to make art by printing directly onto drop cloth from your printer!  These prints are gorgeous and being able to print onto a drop cloth opens up a world of possibilities.

10. Drop Cloth Pillows

via
Beth, from Home Stories A to Z, inspired by Ballard Designs, made some gorgeous pillows out of a drop cloth for her front porch.  She offers a great tutorial on how to do this.


I hope this post has inspired you to be creative!  When you're out shopping for plants, paint, or just basic household supplies at Lowes over the weekend, grab a drop cloth and make something for your home!

Thursday, March 1, 2012

Homemade Pasta {A Birthday Gift Review}

Tuesday was my big birthday:  I've reached my 30's!  It's really not that bad.  I guess for some reason I thought I'd be mildly depressed about hitting this new decade, but it's no big deal after all.  I'm thankful for the life I've been given.

For the past few years I've been wanting to know how to make homemade pasta.  Sure, dried pasta is fairly inexpensive, but there has been something appealing to me about making my own.  So, this year for my birthday I requested a pasta maker.  I did some research and most reviews I read recommended a manual pasta maker rather than an electric one.  This is the one that was given to me:

via

When I first looked at it, I thought that for sure I would end up in tears while making my first batch.  Oh, no!  This machine is SO easy to use and I LOVE it!!  Making pasta from scratch does take time, but once I got the hang of rolling it out, it went pretty quickly.  Fresh pasta only takes about 5 minutes to cook, so you do save some time on that end {at least 5 minutes--ha!}.  

How does one make pasta, you ask?  It couldn't be any easier, really.  Mix together some flour, eggs, and water when needed, and you have a basic pasta dough.  I'm looking forward to trying some variations of this, like spinach pasta, black pepper pasta, tomato pasta, etc.  Plus, it will be really fun to make homemade ravioli, tortellini, and other stuffed pastas.

What recipe did I attempt first, you ask?  None other than a classic Fettuccine Alfredo.  It was delicious.

This is what it looks like after going through the pasta maker, pre-cooked.


I think she had me take 15 pictures of her eating pasta.

Sorry for the blurry one, but Isabella wanted to show off her long noodles.


Wednesday, February 29, 2012

4 Simple Painting Tips

The past week has been a flurry of projects as I'm trying to wrap up the major decor items in the girls' bedroom.  Thankfully, the painting is finished! {well, I should say it's almost finished.  There are about 24 inches of the highest part of the vaulted walls yet to be painted, but we're going to wait to get a taller ladder and do that at the same time as the nursery}.  My part is done, though!  I even had enough paint to paint the upstairs bathroom the same color!  Woohoo!!  Bye-bye builder's grade paint :)

Since I've had paint on the brain this week, I thought I would give you a few tips for painting.  I am by no means an expert painter, but I have learned a couple things that have been extremely helpful in my painting endeavors.

1. Use a handled cup with a magnetic bar for cutting in trim.  The first time I painted a room I think I used a plastic cup when I painted around the trim.  This proved to be quite messy, and definitely not professional.  When we moved into this house and started painting, we discovered these handy little paint 'mugs'.  There is a magnetic piece on the inside that your trim brush will stick to {the metal part} so that your brush and paint are all in one small and secure place.


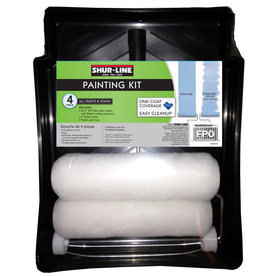
2. Purchase a teflon lined paint tray.  This has proven to be a wonderful investment for us!  Once the paint has dried in the pan, it pulls off so easily.  See image below for proof.


I don't know what brand we have, but here is one that I found on Lowes.com, in case you're looking to buy one.

via
3. Store paint laden rollers and brushes in ziploc bags in the fridge.  If you're painting a room and don't have time to do it all at one time, instead of washing out the rollers/brushes every time, simply put them in a bag, refrigerate, and they'll be ready to use when you have another spare moment.  I even used several plastic grocery bags for my roller this time, and it worked just fine.


4. Keep baby wipes handy for cleaning spills.  A wet rag or paper towel will work fine too, but I have found that baby wipes are perfect for wiping paint drips off of trim.

Just a few quick tips for you that will hopefully help save you some time when painting.

{For those who may be wondering, this is NOT the paint color that I used in the girls' bedroom!  This was a Glidden paint I received free last year and used it to paint the laundry room.  I haven't gotten any further than that in my laundry room, which is why you haven't seen any pictures of it on this little blog.  Maybe some day...}

What painting tips do you have?

Monday, February 27, 2012

Fabric for the Nursery: Purchased!

A huge thank you to everyone who voted on the fabric choices I mentioned a couple weeks ago.  I thought my mind was made up, and over the weekend, Bradley and I were discussing the nursery again, trying to figure out what we wanted to do.  I had purchased some curtains at Target {on clearance} and thought about cutting them up to make the baby bedding.  Then, when I went online to compare it to my favorite fabric choice, I noticed that Premier Prints fabrics were on sale!!  I quickly perused the options and we definitely liked what we saw.  I had seen these fabrics before, but they were a bit too pricey, so I had ruled them out.  I took the plunge yesterday and ordered the fabric; it should arrive by the end of this week!

So, are you curious as to what I chose??  I ordered some of each of these fabrics, and will put them together, along with some solid white fabric I already have, to create the nursery bedding, window treatment, and other accessories.


What do you think?

Friday, February 24, 2012

Scalloped Red Potatoes with Rosemary

Before I give you the recipe, I have a quick decorating update:  the girls' room is halfway painted!!  I finally mustered up the energy {plus, I think I'm nesting} yesterday to get to it.  Of the 4 walls in their room, two have vaulted ceilings, so I have to wait for Bradley to be home before tackling those two walls, but the other two are finished, plus I cut in all of the lower trim.  It's coming along!

On to the recipe...

We love potatoes at our house, and I'm always looking for different ways to make them.  Since Easter is coming up in a few weeks, I thought I would try a potato dish that would be a wonderful side to an Easter ham.  These potatoes are perfect for that!  Leaving the red skins on makes it a colorful dish, too.


Scalloped Red Potatoes with Rosemary


5 red potatoes
3 tablespoons flour
4 tablespoons butter
salt
pepper
dried rosemary
2 cups milk

Wash the potatoes, and leaving the skins on, thinly slice.  Grease, or butter, a 2 1/2-quart baking dish, then line bottom with a layer of potatoes.  Sprinkle 1 tablespoon flour, salt, pepper, and a dash of rosemary over potatoes.  Dot with 1 tablespoon butter, cut into little pieces.  Repeat layers 2 more times.  Pour milk over top of all.  Bake at 350F for 1 hour.

slice the potatoes thinly

first layer, dotted with butter and seasoned

pre-cooked

finished product

source:  slightly adapted from The Fannie Farmer Cookbook


Linking to:


Wednesday, February 22, 2012

Weekend Away

Back around Christmas time, I told Bradley that I really wanted our family to go and visit my parents for a long weekend.  We don't usually take time off to be with them, so our time there is usually 24 hours, which is wonderful, but not long enough.  Since my birthday is coming up next week, we thought it would be fun to visit them around my birthday and get to celebrate with my family.  We had a great time!  AND, to top it off, we were surprised with about 6 inches of snow on Sunday!!  Here are a few pictures of my girls enjoying the snow {I stayed inside with my 6 month old nephew}.

No boots, but plastic bags over the shoes worked just fine.

My older sister and her daughter.

My mom started the snow man construction.


Cousins with their creation.


Nini/Nana with her three granddaughters.

Not the best quality picture, but these are my awesome parents who played in the snow for about 1 1/2 hours!

On Saturday, we had a nice visit with some dear friends for breakfast.  Then, my family gave me the day off!  It was wonderful!  I mostly sat on the couch, just enjoying the company of my family, reminiscing over the past 30 years, and being spoiled.  They cooked an amazing dinner for me, and we ended it with some fantastic cheesecake.  My sister, Sherri, captured some the photo below, and other photos of the birthday celebration, so head on over to her blog to check out the festivities!

photo courtesy of lifeofawife

We just got back home last night, to a clean house {yay!} and I'm gearing up to finish the girls' room, hopefully by the end of this month {only 1 week left!}.  I just need a huge burst of energy and then it's on to painting, sewing, and decorating.  Can't wait to show you the reveal!